Here's the problem nobody talks about when building AI agents for Windows: the automation APIs are a disaster. You ask the system "where's the button?" and half the time it just shrugs.
That's how this whole thing started. We were building an AI agent that could operate Windows apps — clicking buttons, filling in forms, navigating menus. The standard approach works great in demos. In real life? It breaks constantly.
So we built our own fallback. This is the honest story of how that went.
The problem with Windows automation (it's worse than you think)
Windows has a built-in system called the "accessibility tree." Think of it like a map of every button, text box, and checkbox on screen. Libraries like pywinauto read that map and tell your agent what to click.
In theory, this is perfect. Every app should expose this map. In practice? Tons of apps don't. Custom-built controls, old Win32 software, Electron apps — they'll show you a flat wall of pixels and nothing else. Your agent is blind.
The frustrating part
The API returns zero useful data. Not an error — just nothing. Your automation script is left staring at pixels with no idea what they are.
The classic workaround is template matching: take a screenshot, find a saved image of the button, click the center. It works until the user changes their DPI, installs a dark theme, or opens the app on a different-resolution monitor. Then it breaks. Every time.
What we actually needed was something smarter — a model that could look at any screenshot and say: "that's a button, that's a text box, that's a dropdown." Something that generalizes instead of memorizing.
"What if we just trained a detector that understands UI element types — the way a human does?"
The plan (and why the obvious version didn't work)
Our first thought was simple: grab a bunch of real screenshots from Windows apps, draw boxes around every button and text field, and train a YOLO object detection model on it.
Dead end #1
Manual annotation is brutal. We tried labeling real screenshots by hand. Two hours in, we had maybe 50 usable images. We needed thousands.
Dead end #2
Scraping screenshots from the internet sounds great until you realize most UI screenshots are low-res, cropped, or don't cover the element types you need in the right proportions.
The pivot
What if we just made fake screenshots? We could render HTML/CSS that looks exactly like Windows UI, and the browser gives us pixel-perfect bounding boxes from the DOM — zero manual labeling.
This was the idea that changed everything. Instead of annotating real screenshots, we'd generate thousands of fake ones — each one a synthetic Windows-style screen built from HTML templates, rendered with Playwright, and automatically annotated from DOM coordinates.
The insight
HTML renders into exactly the pixels you expect, and the DOM knows every element's exact position. Instant ground truth. No human labeling needed.
Building the fake screenshot factory
We wrote templates — HTML and CSS files that look like Windows 10 and 11 UI. Dialogs, settings panels, login screens, forms. Each template could randomize fonts, colors, DPI scaling, element positions, and background noise.
Then Playwright rendered each one into a PNG and extracted the bounding box coordinates directly from the DOM. One script, 3,000 synthetic screenshots, zero hours of labeling.
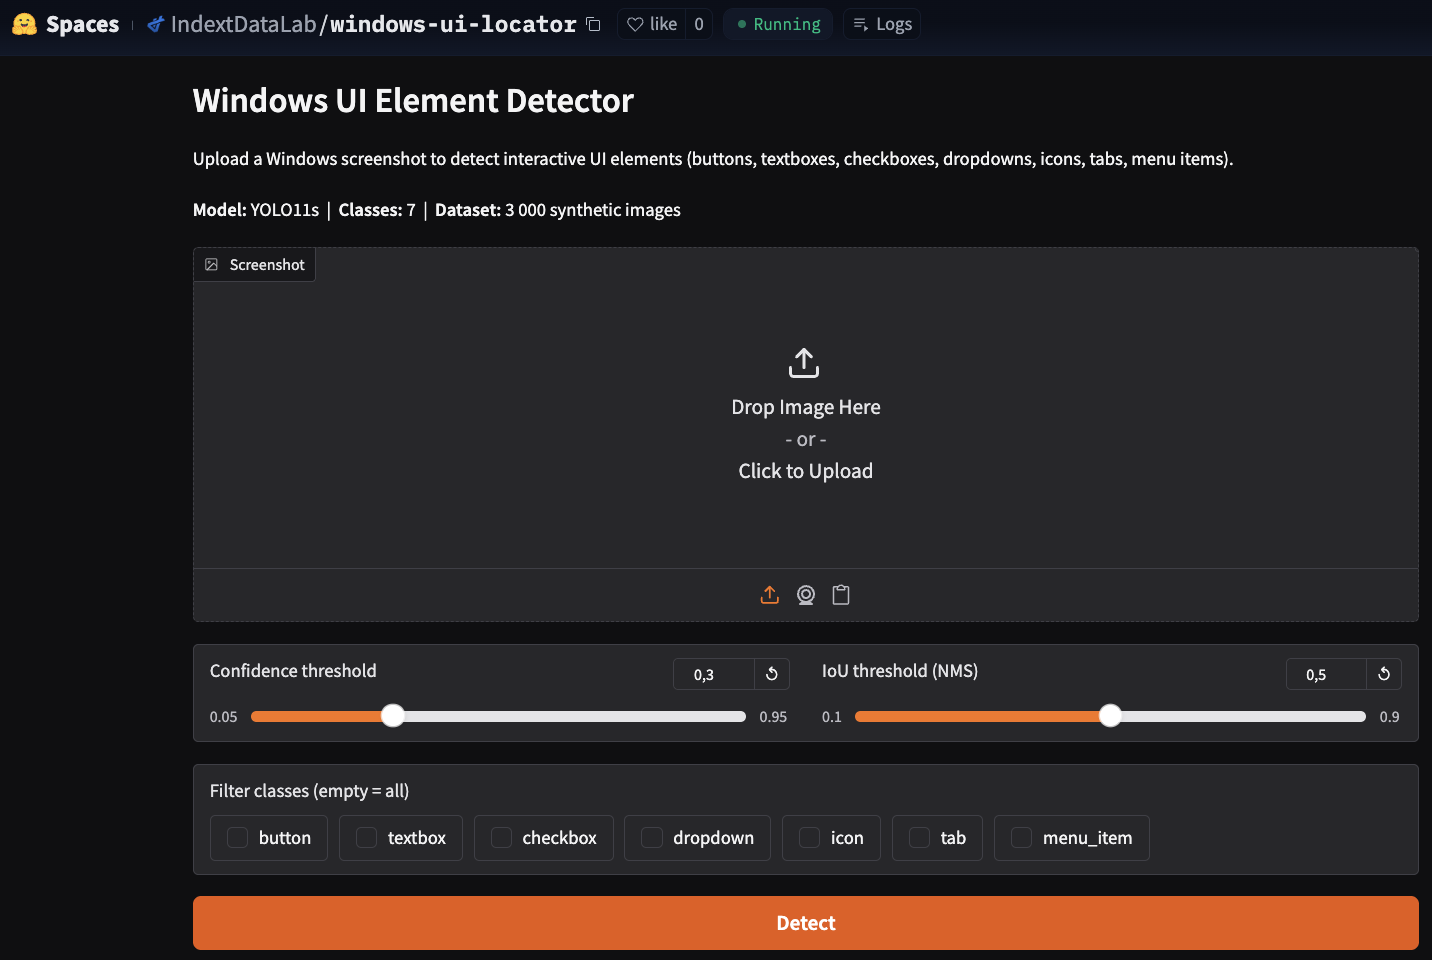
python data_gen/generate.py --out datasets/ui_synth_v2 --n 3000 --seed 42We targeted 7 element classes: buttons, textboxes, checkboxes, dropdowns, icons, tabs, and menu items. Those cover the vast majority of things an agent actually needs to interact with.
The domain randomization was key. If every fake screenshot looked identical, the model would memorize instead of learning. We varied everything we could think of — themes, fonts, sizes, noise levels, widget states.
The model: from YOLOv8 to YOLO11
We started with YOLOv8n — the smallest, fastest version. It was fine. mAP@50 around 0.93, which sounds impressive until you're deploying it in a real agent and 7 wrong clicks in 100 trips up your workflow badly.
Lesson learned
"93% accurate" sounds good in a research paper. In production automation, it means your agent fails on 1 in 14 interactions. That adds up fast.
We upgraded to YOLO11s — a bigger model in the same family. Accuracy jumped significantly. The trade-off was speed: CPU inference went from around 30ms to around 60ms. But here's the thing — this model only fires when the accessibility tree fails. It's a fallback, not the main path. 60ms is completely fine.
Training took 120 epochs with early stopping on an RTX 5060. The results were better than we expected:
Six percentage points on mAP@50 doesn't sound massive. But it's the difference between an agent that frustrates users and one that works reliably enough to ship.
The part we almost skipped (and shouldn't have)
Detecting buttons is one thing. But an agent doesn't just want coordinates — it wants to click the right button. "Submit" not "Cancel." "Sign in" not "Sign up."
So we added an OCR layer. For each detected element, EasyOCR reads whatever text is visible inside the bounding box. Then when the agent says "click the Sign In button," the system fuzzy-matches that query against every detected element's text and returns the best match.
match = find_by_text("screenshot.png", query="Sign in") if match: x, y = safe_click_point(match.bbox) print(f"Click at ({x}, {y})")We used rapidfuzz for the fuzzy matching — specifically token_set_ratio, which handles word reordering and minor OCR errors really well. "Sign in" matches "Signin." "Submit form" matches "Submit." It's robust in a way that exact string matching never is.
Why EasyOCR over Tesseract
EasyOCR installs with a single pip command, supports 80+ languages, and returns word-level bounding boxes that line up perfectly with our detector output. Tesseract needs system packages and is fragile in automated environments.
Does it actually work on real apps?
The honest answer: mostly yes, with some caveats.
The model was trained entirely on synthetic data — fake Windows-style UI rendered in a browser. Real apps, especially heavily custom-themed ones, can look quite different. We saw a noticeable accuracy drop on Electron apps with unusual styling.
But for standard Windows 10 and 11 apps — the vast majority of what enterprise agents interact with — it works well. The training pipeline is open source, so if your target app has unusual styling, you can generate more synthetic data that matches it and fine-tune.
What we'd do differently
If we started over, we'd spend more time on the synthetic data variety earlier. The biggest accuracy gains came not from model changes but from making the fake screenshots more realistic — adding more noise, more edge cases, more unusual layouts.
We'd also add more element classes from the start. Date pickers, tree views, and data grids all exist in the real world. Right now, if an agent hits one of those, it has to fall back to coordinates. That's fine for now but it's the most obvious gap.
And we'd integrate the action verification layer sooner. Before/after screenshot comparison to confirm a click actually worked — we added it late, and it's actually one of the most useful features for building reliable agents.
The bigger picture
This project started as a small piece of a larger agent framework. We needed a fallback. We built a library. Along the way we learned a lot about synthetic data generation, the real cost of accuracy in production, and why "good enough in testing" almost never means "good enough when deployed."
The whole thing is open source — model weights on HuggingFace, code on GitHub, MIT license. If you're building Windows automation and hitting the same accessibility API dead ends we did, this is for you.
"The API returns nothing. Your agent is blind. So you build it eyes."
That's what this is. A set of eyes for agents that need them.